Rain &
ripples tutorial
Hi dear
friends:
This is an easy tutorial
to do nice rain , snow
or other weather
aniomations with the
nice program Sqirlz
Reflect. You´ll have a
nice image but it has a
big weight.. I´ll tell
you how to low the
weight using Animation
Shop after you get your
animatin on Sqirlz
Reflect.
I will upload the
Program to You Sen It
and To Send Space for
you to download
This is what are we
going to do:
 1.
Install Sqirlz .. It´S a
little and nice programe
1.
Install Sqirlz .. It´S a
little and nice programe
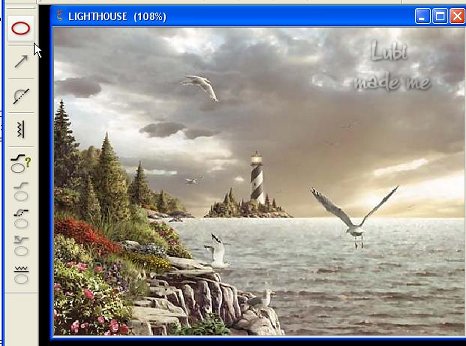
2 .- Open sqirlz and go
to Filoe ... And Opne
an image you want to use
( of course it has to be
an image of a rainny day
or with water
3.-
Start making a
selection with this
tool
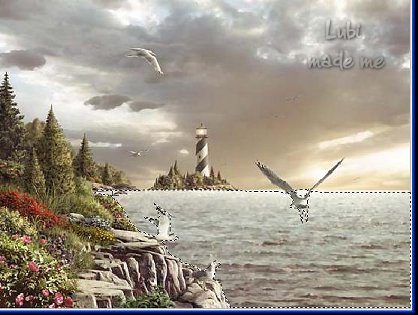
You have to select the
part where you want the
effect :-)
Look at my selection:
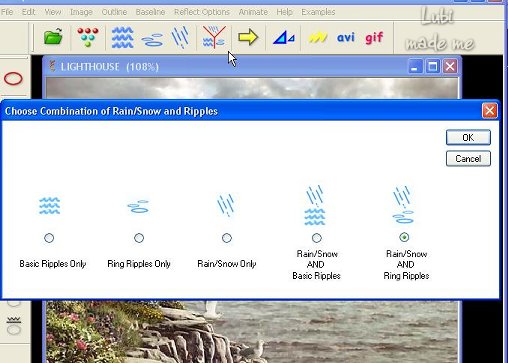
4.- Now I want to make
rain and ripples on the
water
5.- Go to this ( look at
the mouse arrow in the
shot ) and a window
opens and you have to
check
Rain/ snow and Ring
Ripples-
after this.. Click OK
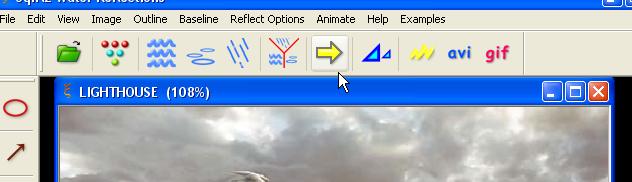
6.- Now you are going to
see your animation.
Click on this yellow
arrw and wait just a
little time.
7. - You see your
animation now.. You´ll
see that rain is strong
.. Or may be you don´t
like how it looks. We
are going to correct the
rain or the ripples size
Here you see the rain do
not looks nice..:
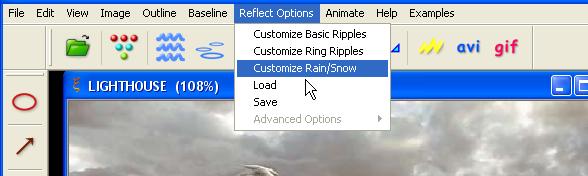
8.- Go to
REFLECT OPTIONS
and click on Customize
Rain/Snow
A window opens and we
can paly with settings
I will do rain thiner
and I´ll change the
angle of the rain:
Look at my settings and
if you liked how my
animation looks use
thiese setting - Here
you can play as your
likes. I liked a smooth
rain and with drops
water transparency:
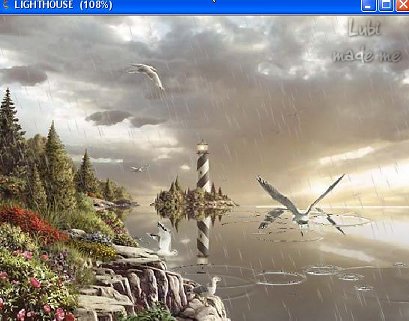
Now It looks like this:
9.- You can use another
settings , also you can
play with other ripples
settigs to make them
small or larger .-
I liked how ripples were
and didn´t make changes:
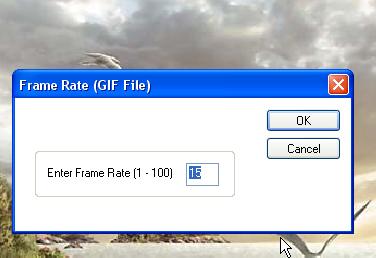
10.- IT´S DONE! WE HAVE
THE ANIMATION..SAVE IT
AS GIF FILE
A windows opens and you
save the
animation..click on OK
.. It will take a few
seconds to get the
animation:
You´ll see it´S a big
file in weight:
We ´ll reduce this
file:
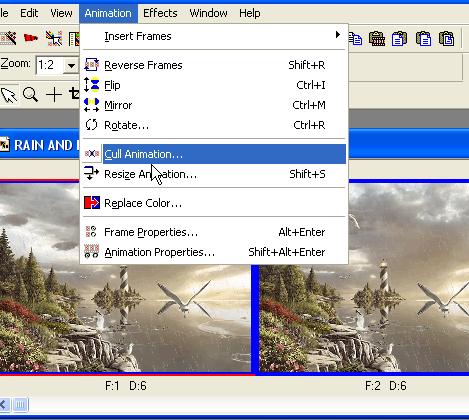
11.- Open the animation
in Animation Shop
You´´ see we have 20
frames in the animation:
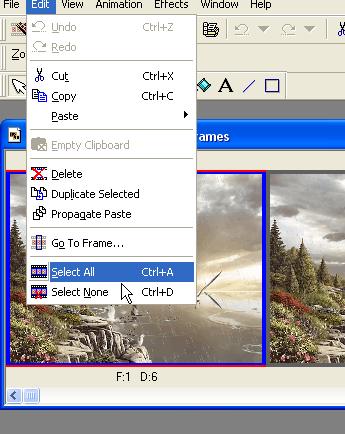
Go to Edit - Select all
and after this go to -
Animation - Cull
animation
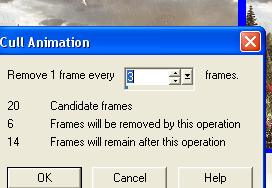
12.- A little window
opens and you put the
frames you want to take
off.. .- It will take
off 1 frame per 3
frames.. Click ok!
13.- Repeat Step 12 ..
Six or seven times-- you
have to get just 4
frames , may
be you want 3 frames..
Don´t forget to do Edit
- Select all--
I made my animation with
4 frames.-
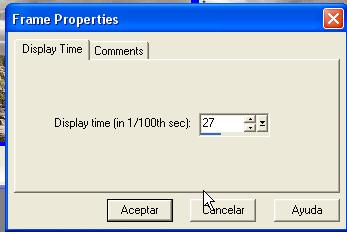
14..
Now we are going to
change the animation
frame properties.. To
have a nice rain and
ripples .-)
You have to go to
Edit - Select all
( this step selct all
the frames)
Then go to -
Animation - Frame
properties
A window opens and
select the properties
I used this settings:
It´S done- we have
our nice rain and
ripples!!
15 - I f you want to put
a frame to the
animation.. You can do
this:
Look the dimension of
your animation frame:-
Mine was 504 x 378
Go to PSP and open a new
transparent image 504
x 370
I made this frame.. Do
not do a big frame
because it will do the
animation more weight..
Save the frame as gif or
jpg
And open the frame in
Animation Shop
16. Now DUPLICATE THE
FRAME 3 TIMES . You have
now 4 frames -
Go to your rain and
ripples animation and
Select all frames -
Go to your frame and
Select all frames and
now Insert the Rain &
ripples on the Frame:
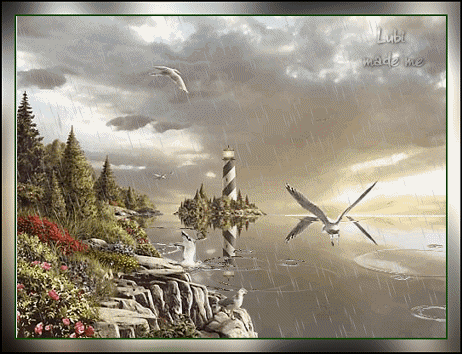
You´ll have the
animation that is on the
top of this Tutorial
After this you do a nice
stationery and show us
how your animation looks
:-))
I HOPE
YOU ENJOY THIS PROGRAME
AND THE TUTORIAL.. I
think it´S a nice rainny
animation and very easy
to do!!!